BillPay
BillPay can be processed via the Saferpay JSON API. However, as BillPay is a third party provider, there are a few things which must be observed.
Requirements
- A corresponding licence and thus the existence of a valid identification with a username and password for the Saferpay system.
- Availability of at least one active Saferpay terminal via which payment can be carried out, and availability of the associated Saferpay TerminalId.
- A valid acceptance agreement for BillPay.
- The address of the purchaser is present and is forwarded to BillPay.
For BillPay activation on the Saferpay terminal, please inform our activation service cs.ecom@six-payment-services.com about your BillPay credentials and the desired currency.
BillPay Certification via API
Before they can conclude a transaction via BillPay, all BillPay customers have to be entered into a so-called “Certification Provider”. Prior to the going-live, BillPay expects each merchant to trigger a transaction via this provider. As proof, BillPay requires a complete invoice from the merchant system. After examination, information on the live account data is provided. In contracts for BillPay Purchase on Receipt and BillPay Direct Debit, the operation must be performed for each payment method.
For certification, a simple transaction on the Payment Page is performed using the JSON API. For this, the means of payment (BillPay Purchase on Receipt or BillPay Direct Debit) must always be specified explicitly via the Payment Methods parameter. Otherwise, the payment method will not be shown on the Payment Page. In addition, it is generally the case – even in live operations – that the transfer of address details to BillPay is not necessary. This can be mapped in two different ways:
1. Delivery via parameters
If address data have already been captured in the shop, they can be forwarded to Saferpay via the corresponding parameter.
Request with address forwarding. See the Payer => DeliveryAddress container. Important: DeliveryAddress must be used!
{
  "RequestHeader": {
    "SpecVersion": "1.3",
    "CustomerId": "123123",
    "RequestId": "33e8af17-35c1-4165-a343-c1c86a320f3b",
    "RetryIndicator": 0,
    "ClientInfo": {
        "ShopInfo": "My Shop",
        "ApplicationInfo": "ApplicationInfo",
        "OsInfo": "Windows Server 2016"
    }
  },
  "TerminalId": "12345678",
  "Payment": {
    "Amount": {
      "Value": "100",
      "CurrencyCode": "EUR"
    },
    "OrderId": "OrderId",
    "Description": "Description",
    "PayerNote": "Payernote",
  },
  "PaymentMethods": ["DIRECTDEBIT"], // Use "INVOICE" for Purchase on Receipt!
  "Payer": {
    "IpAddress": "111.111.111.111",
    "BillingAddress": {
      "FirstName": "Hans",
      "LastName": "Muster",
      "DateOfBirth": "1969-07-21",
      "Street": "Strasse 1",
      "Zip": "12345",
      "City": "Musterstadt",
      "CountryCode": "DE",
      "Phone": "+49 40 1234 5678",
      "Email": "Muster@muster.com",
      "Gender": "MALE",
    }
  },
  "ReturnUrls": {
    "Success": "https://merchanthost/success",
    "Fail": "https://merchanthost/fail",
    "Abort": "https://merchanthost/abort"
  },
  "Notification": {
    "MerchantEmail": "merchant@saferpay.com",
    "NotifyUrl": "https://merchanthost/notify"
  }
}
2. Data capture via a form
Alternatively, an address form, in which the customer must enter their address details, can be displayed in the Saferpay Payment Page. Make sure that all the address details needed for BillPay payment are requested in the address form.
Request for form usage. See the DeliveryAddressForm container. Important: DeliveryAddressForm must be used!
{
  "RequestHeader": {
    "SpecVersion": "1.3",
    "CustomerId": "123123",
    "RequestId": "33e8af17-35c1-4165-a343-c1c86a320f3b",
    "RetryIndicator": 0,
    "ClientInfo": {
      "ShopInfo": "My Shop",
      "ApplicationInfo": "ApplicationInfo",
      "OsInfo": "Windows Server 2016"
    }
  },
  "TerminalId": "12345678",
  "Payment": {
    "Amount": {
      "Value": "100",
      "CurrencyCode": "EUR"
    },
    "OrderId": "OrderId",
    "Description": "Description",
    "PayerNote": "Payernote",
  },
  "PaymentMethods": ["INVOICE"], // Use "DIRECTDEBIT" for Direct Debit!
  "Payer": {
    "IpAddress": "111.111.111.111"
  },
  "DeliveryAddressForm": {
    "Display": true,
    "MandatoryFields": ["CITY","COUNTRY","EMAIL","FIRSTNAME","LASTNAME","PHONE","SALUTATION","STATE","STREET","ZIP"],
  },
  "ReturnUrls": {
    "Success": "https://merchanthost/success",
    "Fail": "https://merchanthost/fail",
    "Abort": "https://merchanthost/abort"
  },
  "Notification": {
    "MerchantEmail": "merchant@saferpay.com",
    "NotifyUrl": "https://merchanthost/notify"
  }
}
Assert
With Payment Page Assert, all the necessary information is sent back to the merchant. This includes the transfer of purchase-on-invoice credit transfer data that must be forwarded to the buyer.
Example Payment Page Assert Response
{
  "ResponseHeader": {
    "SpecVersion": "1.3",
    "RequestId": "33e8af17-35c1-4165-a343-c1c86a320f3b",
  },
  "Transaction": {
    "Id": " E6tnhrAbrYGfvAYvff47b7fG6Kfb",
    "Date": "2015-10-15T10:01:42.527+02:00",
    "Amount": {
      "Value": "100",
      "CurrencyCode": "EUR"
    },
    "OrderId": "Order_ID_is_mandatory",
    "AcquirerName": "Purchase on Receipt certification",
    "AcquirerReference": "a83e4312-e85c-4b30-9e7c-50b511155a55",
    "Invoice": {
      "Payee": {
        "IBAN": "DE2501200000TEST000000000003",
        "HolderName": "Billpay GmbH",
        "BIC": "TESTBIC0003",
        "BankName": "BillPay Test Bank"
      },
      "ReasonForTransfer": "BPOrder_ID_is_mandatory/544",
      "DueDate": "2015-10-15T10:01:42.527+02:00"
    }
  },
  "PaymentMeans":{
    "Brand":{
      "PaymentMethod": "INVOICE",
      "Name": "Billpay Purchase on Receipt certification"
    }
  }
}
Capture
Like other means of payment, BillPay transactions must also be booked (captured). For this booking, use the Transaction Capture method. If you have agreed upon the due dates of payments with BillPay, the due date of payment can be delayed in Capture Request with DelayInDays.
Example for Capture Request. For this, see the Billpay container.
{
  "RequestHeader": {
    "SpecVersion": "1.3",
    "CustomerId": "[your customer id]",
    "RequestId": "[unique request id]",
    "RetryIndicator": 0
  },
  "TransactionReference": {
    "TransactionId": "723n4MAjMdhjSAhAKEUdA8jtl9jb"
  },
  "Billpay": {
    "DelayInDays": 5
  }
}
Some of the key information, such as the invoice data, are returned by Saferpay via Capture.
Example for Capture Response
{
  "ResponseHeader": {
    "SpecVersion": "1.3",
    "RequestId": "[your request id]"
  },
  "TransactionId": "723n4MAjMdhjSAhAKEUdA8jtl9jb",
  "Date": "2015-01-30T12:45:22.258+01:00",
  "Invoice": {
    "Payee": {
      "IBAN": "DE2501200000TEST000000000003",
      "HolderName": "Billpay GmbH",
      "BIC": "TESTBIC0003",
      "BankName": "BillPay Test Bank"
    },
    "ReasonForTransfer": "BPOrder_ID_is_mandatory/544",
    "DueDate": "2015-10-15T10:01:42.527+02:00"
  }
}
BillPay Certification via Saferpay Backoffice
Because it is not always possible to conduct certification in every shop without interrupting live operations, Saferpay Backoffice offers the option of creating a payment URL for a BillPay test payment via the Payment Page. This can be used to perform the acceptance test.
Because this is not performed via the shop, the shop is not informed about the purchase. It is therefore necessary to manually create the invoice required by BillPay. You can find the necessary data for this in the Saferpay Backoffice via Transactions > Journal. There you can find a list of all transactions, which you can then view in detail.
In your Saferpay Backoffice go to the Webshop heading and select the option All Offers:

Then click on “Add new offer”:

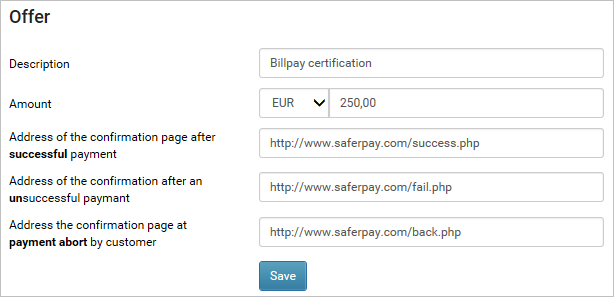
The form for a new offer is shown:

Fill out the fields for the description and the amount and, if necessary, select the currency and add the return addresses for your web shop. Then click on “Save”.
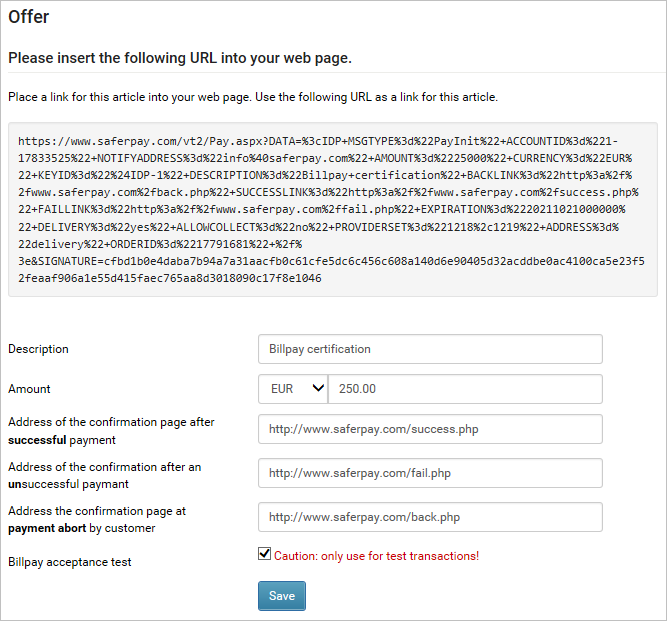
The stored offer will appear with the test payment URL for BillPay acceptance:

Make sure that the checkbox marked “Caution: only use for test transactions!” has been ticked. When creating an acceptance invoice, ensure that the created test URL contains a random OrderId allocated by Saferpay. When using a test URL, the customer address must be entered manually in the Payment Page.
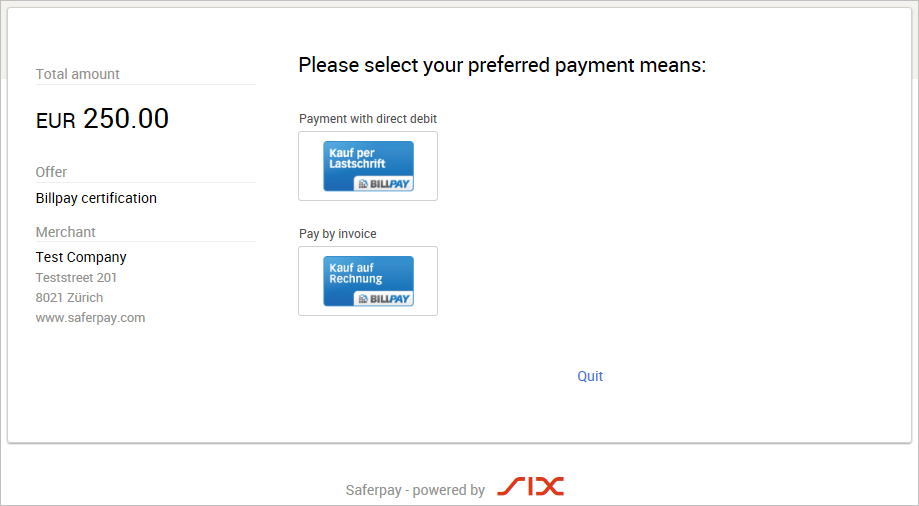
After loading the links, the Saferpay Payment Page appears with one or more options for BillPay test payment methods:
