TWINT
This chapter will handle all specifics involved with the integration of the payment method TWINT.
Requirements
- A corresponding license and thus a valid identification with a username and password for the Saferpay system.
- At least one active Saferpay terminal via which payment can be carried out and the associated Saferpay TerminalId.
- A valid TWINT contract
- JSON API Version 1.7 or later
- Twint can only be used via the Payment Page. Please follow the general guide there!
General specifics
- Reservation time: Unlike normal credit card transactions, where a capture could be attempted after the normal reservation time, TWINT does only offer a maximum timeframe of 7 days! After that the transaction will be discarded and a capture will not initiate the money-transfer with the next batch-close, so make sure, to capture your transactions within this time limit!
- Refund times: Due to processing limitations, a refund can fail, if it is executed earlier than two hours after the initial transaction. The initial transaction needs to be processed first, until a refund can be executed, which happens within said two hours!
User on File
Twint User on File saves Twint payment means inside the Saferpay Secure Card Data Store, allowing you to execute subsequent transactions on a users Twint account.
Requirements
The following requirements are to be met, if Twint User on File is to be used, aside the normal requirements:
- A Saferpay Business License.
- A license for Saferpay Secure Card Data, which is usually included in Saferpay Business!
- The activation of User on File for your contract. Please as your contractual manager, if you want this feature enabled!
- JSON API Version 1.14 or later
Important: Twint User on File is only available via the Standalone Secure Card Data registration and requires Saferpay Business, so the card data may be used! Furthermore, the Twint aliases may only be used with Authorize Direct.
Alias Insert Request
The registration is done via the Saferpay Alias Store. Within the Alias Insert Request, you need to specify the parameter Type with the value TWINT, which signals, that you want to save Twint payment means.
Eample
{
  "RegisterAlias": {
    "IdGenerator": "RANDOM_UNIQUE"
  },
  "Type": "TWINT",
  "LanguageCode": "en",
  "RequestHeader": {
    "SpecVersion": "1.14",
    "CustomerId": "242225",
    "RequestId": "5f543be575b3f3ecff3214257ac6978a",
    "RetryIndicator": 0,
    "ClientInfo": {
      "ShopInfo": "My Shop",
      "OsInfo": "Windows Server 2013"
    }
  },
  "ReturnUrls": {
    "Success": "https://www.myshop.com/success",
    "Fail": "https://www.myshop.com/fail",
    "Abort": "https://www.myshop.com/abort"
  }
}
Alias Insert Response
Saferpay will then respond with a normal Alias Insert Response, giving you the Token for further actions and a RedirectUrl.
Example
{
  "ResponseHeader": {
    "SpecVersion": "1.14",
    "RequestId": "5f543be575b3f3ecff3214257ac6978a"
  },
  "Token": "y6678qfw3dm9pule1inqkpr1o",
  "Expiration": "2019-11-15T14:39:16.642+01:00",
  "RedirectUrl": "https://test.saferpay.com/vt2/api/register/twint/242225/y6678qfw3dm9pule1inqkpr1o"
}
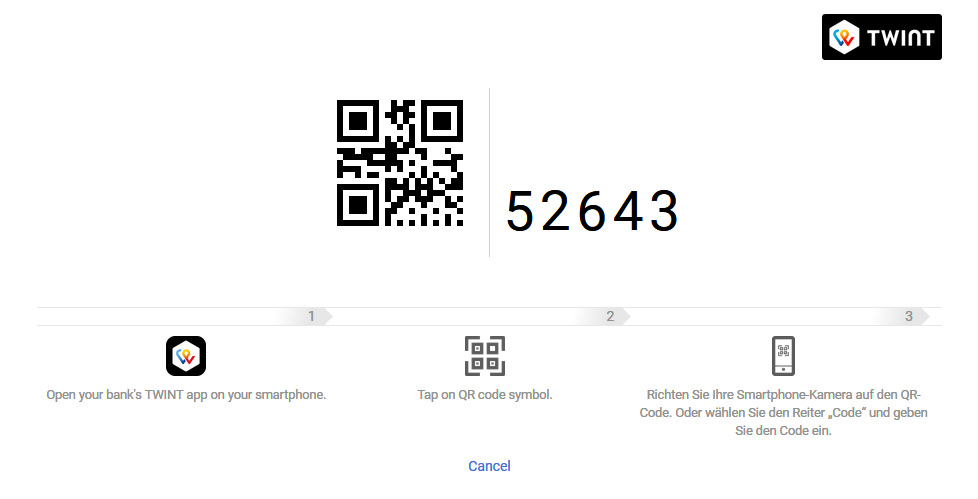
The RedirectUrl then needs to be opened inside an iFrame, as a redirect, or lightbox. Saferpay will then present the following screen.

Here the User can either scan the QR-Code, or manually enter the PIN-Code inside his Twint App. There he needs to confirm the registration.
Redirect to Shop
Once this process is done, the user gets redirected towards one of the previously defined ReturnUrls, depending on the outcome.
Alias Assert Insert Request
The merchant system then needs to execute the Alias Assert Insert Request, in order to gather the alias and other important payment mean details.
Example
{
  "Token": "67tdpr8keb3ky3y6728kqv4gk",
  "RequestHeader": {
    "SpecVersion": "1.14",
    "CustomerId": "242225",
    "RequestId": "22c449e9cb06a227491c0f18532d9ef1",
    "RetryIndicator": 0,
    "ClientInfo": {
      "ShopInfo": "My Shop",
      "OsInfo": "Windows Server 2013"
    }
  }
Alias Assert Insert Response
The Alias Assert Insert Response will return the alias itself, for further payments, which can be executed via Authorize Direct, by simply setting the PaymentMeans.Alias container!
Example
{
  "ResponseHeader": {
    "SpecVersion": "1.14",
    "RequestId": "22c449e9cb06a227491c0f18532d9ef1"
  },
  "Alias": {
    "Id": "a2f4d6390bdf5ba4ed9d0c0f2318bc2b",
    "Lifetime": 1000
  },
  "PaymentMeans": {
    "Brand": {
      "PaymentMethod": "TWINT",
      "Name": "TWINT"
    },
    "Twint": {
      "CertificateExpirationDate": "2020-12-15T13:18:08.000+01:00"
    }
  }
}
Important: One speciality with Twint User on File is, the Twint.CertificateExpirationDate parameter. Each registered Twint payment mean, will have its own expiration date within the Twint system, which does not correspond with the Saferpay Alias Lifetime! The parameter will return the expiration date of this registration certificate. Once it has passed, the Twint alias becomes invalid, after a maximum of 13 months!