Secure PayGate REST API
VERY IMPORTANT: Before you start integrating this flow, make sure, you have read the the Introduction and Licenses and Interfaces chapters. They contain general and vital information, not only about the Secure PayGate REST API, but also for you, the merchant!
The Secure PayGate REST API allows a merchants to use the Saferpay Secure PayGate through their own Systems, thus allowing them to create offers and corresponding offer URLs automatically. This allows a high grade of automatation. This chapter will guide you through the necessary steps to use this API.
Requirements
The following requirements have to be met, in order to use the Secure PayGate REST API:
- You need a Saferpay Secure PayGate contract, in order to use the Secure PayGate in the first place
- In conjunction with that, you need at least one Secure PayGate terminal, with attached payment methods of your choice.
- A Saferpay eCommerce licence and thus the existence of a valid identification with a username and password for the Saferpay system, to access the necessary API-functions.
Secure PayGate configuration
Before you can begin using the Secure PayGate, you need to configure it inside the Backoffice under Secure PayGate > Settings.
 First you need to set your Notification email(s). Saferpay will send a payment confirmation mail to these email(s).
Next is the Authorization method you want to apply to your Secure PayGate orders, with the following options available:
- Normal (final) authorization: Your normal authorization. Each payment will be authorized and then needs to be captured, either inside the Backoffice itself, or by using the JSON API
- Preauthorization: Similarto the first option, however preauthorizations extend the validity of the authorized payment from a guaranteed 10, to a guaranteed 30 days, which is helpful, if you want to capture a payment on a later delivery.
- Normal (final) authorization with automatic capturing: Triggers an automatic capture, after a successful authorization.

These settings are important, if you intend on using the Secure PayGate in conjunction with the JSON API (more on that later).
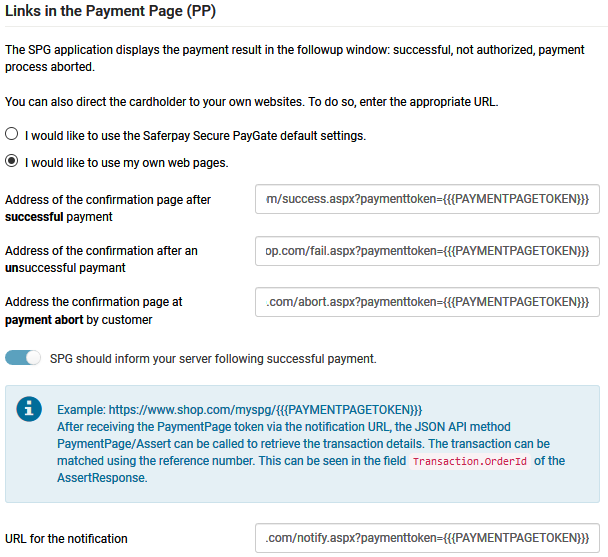
Here you can define, where the Payment Page should send your customer to, after a successful, failed, or aborted payment. This way, you can send the customer towards your website, or even a specifically tailored return-site.
Furthermore, Saferpay can also trigger a server-to-server notification, in case of a successful payment, which is helpful, to avoid redirect-problems with the former URLs, or in cases, where you do not want to use returnUrls and just the payment notification, to gather the payment-details into your system.
Important: In order to gather said payment-data, after these events, you need a payment page token, to initialize the next steps. Saferpay can vorward this token, if you insert the placeholder {{{PAYMENTPAGETOKEN}}} into the defined URLs. Saferpay will replace it with the token and call the URLs with it, via HTTP GET. You then can etract the token and proceed to the chapter Connecting the JSON API.
 Here you can pre-define certain mail-addresses, that will be presented to the payer, aswell as a BCC-address, where Saferpay will send each offer towards, for archiving purposes.

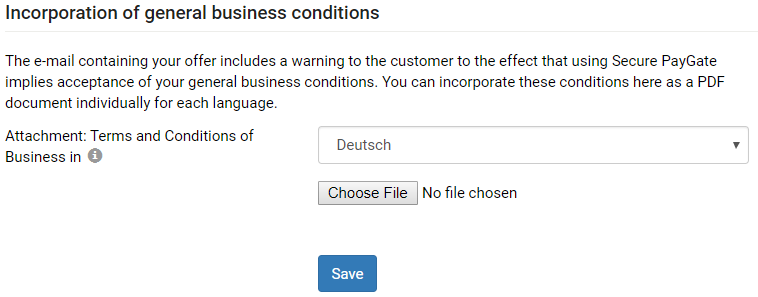
Note: These AGBs are only available, should you use the Secure PayGate inside the Backoffice and not via API!
The REST API
After the configuration has been completed, you can finally move towards using the Secure PayGate REST API. The specification itself can be found over here.
The first thing to consider, is the fact, that the Secure PayGate REST API, is not the same, as the Saferpay JSON-API, even though both can work hand in hand (more on that later). It can be integrated in a similar way and if you already have the Saferpay JSON API integrated, the effort to use the Secure PayGate REST API is rather low. However there are still some technical differences, which are described inside the specification
Sending the Offer
The execution of the SecurePayGateOffer CreateOffer request will create a Secure PayGate offer and the corresponding Link to the payment gateway, like it would inside the Saferpay Backoffice. All the offers will be displayed inside the Saferpay Backoffice and marked as RestApi under the Applicationcolumn, so you can differentiate between manual and automatical created offers.

However: Saferpay will NOT send the usual Secure PayGate E-Mail to your customer, like within the Saferpay Backoffice! The usage of the Secure PayGate REST API instead relies on you -the merchant- using your own web-mailer, which are supported by most common application-environments. PHP for example brings this functionality out of the box. However this also gives you full control over the design and text of the E-Mail, allowing for a great deal of flexibility!
Tip: The Secure PayGate API also supports saving cards inside the Saferpay Secure Card Data storage!
Note: Offers created with the Secure PayGate REST API cannot be edited inside the Saferpay Backoffice!
Connecting the JSON API
As described before, you can gather the payment data from a Secure PayGate transaction via the Saferpay JSON API. For that, you must define the {{{PAYMENTPAGETOKEN}}} (see above), otherwise you do not have the necessary data to execute the next step.
Once the redirect and/or the notification call arrives at your webserver, you can extract the {{{PAYMENTPAGETOKEN}}} and simply execute the Payment Page Assert. That will return the payment data of the Secure PayGate transaction to your system. This transaction is like a normal Payment Page transaction and further steps may be applied to it, for example the Capture, Partial Capture, or Cancel, Refunds via the API may also be executed, if you wish.
VERY IMPORTANT: As of now the automatic capturing-option, as described under Secure PayGate configuration, does not apply to transactions, made via the Secure PayGate API! You always either have to capture them manually through the Saferpay Backoffice, or via the JSON API, as described above!
Try it!
Want to try out the Secure PayGate API for yourself?